Showing posts with label buttons. Show all posts

Sunday, October 16, 2011

Savannah Sewing and Button Themed Wedding


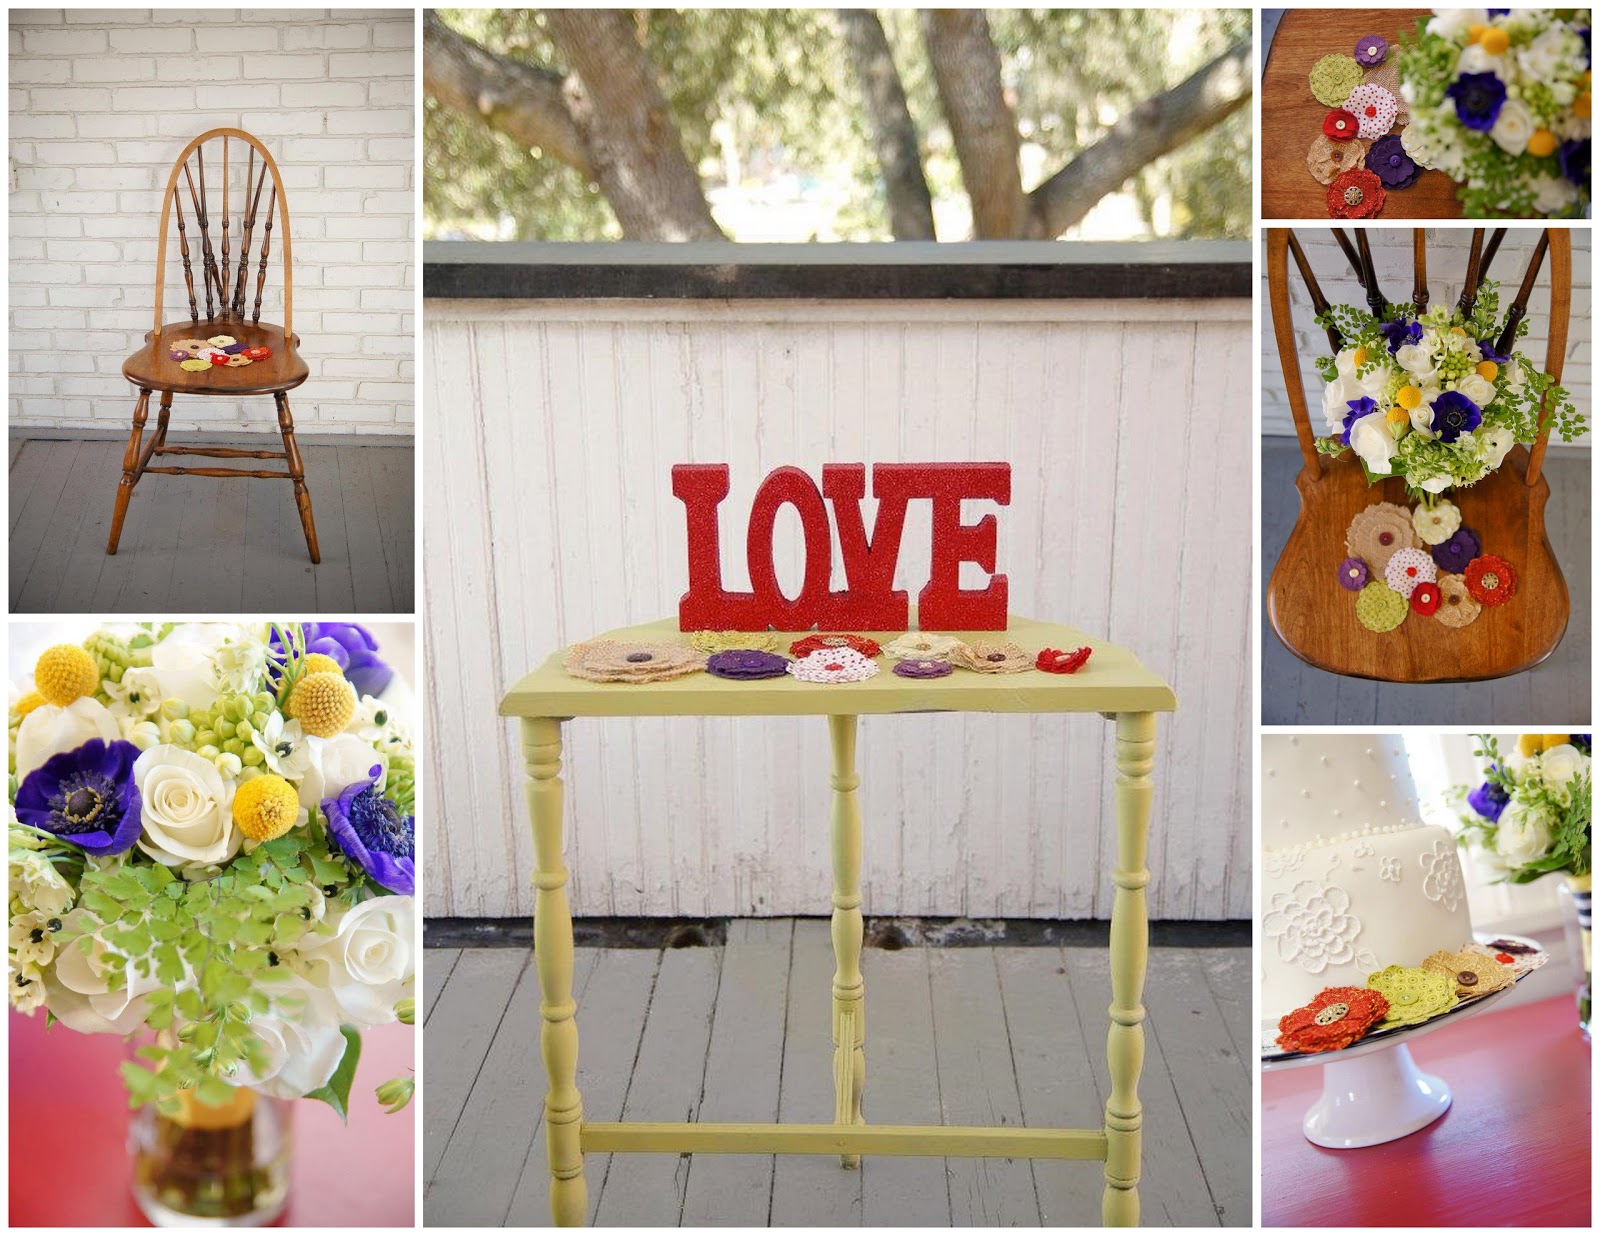
You know I LOVE buttons since I've already done 2 posts on buttons, most recently how to make button boutonniere diy and button-button whos got button post so when a local photographer asked if I wanted to help her with a mentoring photo shoot and could stage what ever I wanted, of course I thought BUTTONS. Yep, I'm the person who saves every button they attach onto your clothes from store in those little bags. So if you lose a button, I have plenty to choose from. I also was handed down my grandmother's sewing kit which was filled with 1950's sewing items, so fun!

So back to the photo shoot! Teresa Little Earnest of Memories n More also the founder of The Wedding Studios is an amazing Savannah photographer with many years of experience and also offers mentoring to "encourage women and help them realize their full potential as professional photographers." You can work with Teresa for 2-7 days and all of your meals and refreshments are included.  Think fried chicken and pralines! She can even pick you up from the airport and return you there. Hey, it’s called southern hospitality! These mentoring workshops are completely customized and you can find out more here: http://www.reallyfunworkshops.com/faq/

Teresa let me create whatever I wanted for the photo shoot at The Wedding Studio and had the flowers made by a to zinnias and the cake was Carrie of Two Cakes adorable faux cake (yep, could you tell?). Runnie Blooms made the assortment of fabric flowers. I made the ribbon wands, bride and groom spools of thread, collected my button and voila! After I staged everything Teresa began her mentoring with Arin Photography. The first images are by Teresa of Memories N More and then the pictures after her's are LeAnnes. So many different perspectives, arrangements, and inspiring ideas! 
I hope you enjoy the beautiful photos - It was so much fun!!


I made these ribbon wands and love this DIY idea of bells attached to your ribbon wands for the Send Off as an alternative to sparklers. See the post here: http://wedding101.net/blog/2011/10/07/friday-diy-bell-send-off-wands-wedding-decor-ideas/


(This cake was not from the shoot but I thought it was amazing and wanted to add it) 


Tuesday, October 11, 2011

{DIY} How to Make a Button Boutonniere


You might know that I LOVE buttons and whenever I see anything button related I'm obsessed!! Check out my other button blog post here ***** get married has been shut down and now being reopened and redesigned so this post is no long there anymore.***** 

How to Make a Button Boutonniere By: Ariela Bonen, RBK Creations
We love being able to incorporate the groom into the overall button theme. Button boutonnieres are a great way to accessorize the groom – after all, it’s their big day too! Below you will find some of our secrets when it comes to creating a great, whimsical button boutonniere.
Items needed
  • Assortment of buttons in different sizes and colors to match your wedding
  • 18-22 gauge wire size 10”
  • Coordinating ribbon
  • Floral Tape
  • Scissors
  • Some type of leaf backing, we used an artificial leaf in this demo
  • Decorative sprigs
  • Corsage Pin
  • Wire Cutters and Needle Nose Pliers
  • Glue Gun and Glue Sticks
All photos by Ariela Bonen: RBK Creations

  • When choosing buttons it is best to get varying sizes you so can stack them nicely and see all of the buttons. A stack of 3 to 5 buttons tends to look the best.
  • Bend your wire in half, load your buttons up on the wire starting with smallest button first and ending with the largest button. You will thread the buttons on to the wire through the holes in your button.
  • Hold the buttons stack with one hand and then twist the wires together with the other hand, all the way to the end of the stem.
  • Once you have the stems twisted to the end, trim the ends to make them even and get rid of the sharp edges.
  • Bend the button stems down so they are facing towards you.
  • Start assembling the boutonniere by adding the stems together, one at a time. Wrap them with your floral tape to hold them together. Try to get it as tight as you can so it holds together.
  • Add your decorative sprig to the back and also attach with the floral tape.
  • Add the leaf and wrap one more time with floral tape.
  • Once your boutonniere is assembled, wrap your stem that is covered in floral tape with the ribbon of your choice. Use your hot glue gun to secure the ribbon on the top.
  • Add your corsage pin and your good to go!

Thursday, June 16, 2011

{Bright Idea Thursday} Button Button - Who’s Got the Button?

I love collecting buttons! 
Whenever you buy clothes and there is a little bag attached with spare buttons I always keep them and add to my collection. You can never have too many buttons!!! Here are some great wedding ideas that use buttons in unique ways.

One of my favorite blogs to follow is Bow Ties & Bliss and they did this adorable blog post back in 2010.
So I had to give credit to their lovely ideas. 
They are also a fellow TWIPS member!
Sources:
second row: 3 ,4, 5. Jackie Wonders 6. Ruffled
One of my favorite types of art is collage. You can create collages out of recycled buttons, magazines, newspapers, cards, wrapping paper, etc. So whenever I get the creative spark to make something it's usually a collage. They definitely required a lot of patience and fine motor skills! This little collage was made for the Hospice Savannah 5" X 7" Art Show